
If your bathroom drawer is full of separate dryers, brushes and curling tools, a 5-in-1 hot air styler can make the routine feel much easier. The key is knowing which attachment to use, how damp your hair should be and when to change the heat setting.
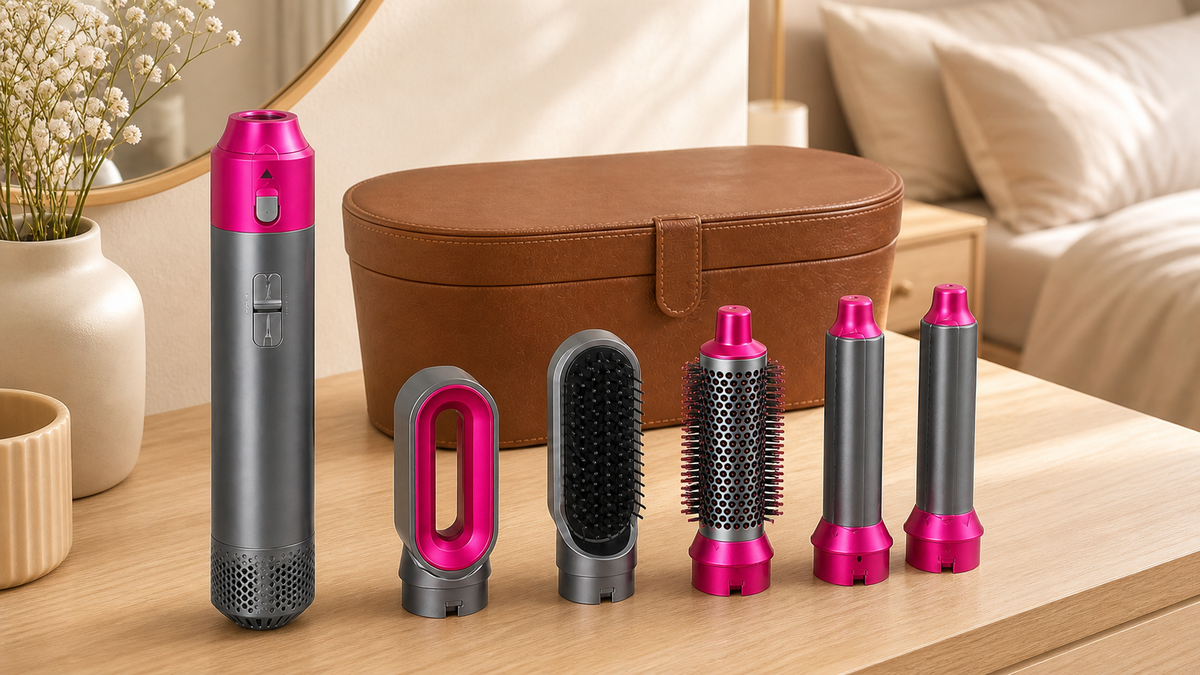
This step-by-step guide explains how to use a 5-in-1 hot air styler for drying, smoothing, volume and air-wrapped curls, using the attachments included with the Velvet & Co styling set.
What does a 5-in-1 hot air styler do?
A 5-in-1 hot air styler uses one powered handle with interchangeable heads. Rather than reaching for a different electrical tool at every stage, you can change the attachment as your hair moves from damp to shaped.
- Pre-styling nozzle: Directs airflow to remove excess moisture before shaping.
- Soft smoothing brush: Helps guide sections from root to tip for a smoother, straighter-looking finish.
- Round hot-air brush: Adds shape through the lengths, lift at the roots and a soft curve at the ends.
- Two air-curling barrels: Use airflow to draw in a section and wrap it around the barrel for curls or waves.
Before you begin
- Start with towel-dried hair rather than hair that is dripping wet.
- Detangle gently so each attachment can move through the section without snagging.
- If you use a heat-protection or styling product, apply it according to its own instructions.
- Fit the chosen head securely using the attachment lock before switching the tool on.
- Use only the voltage version intended for your region. The UK and EU version is rated for 220 to 240V.
- Begin with a lower setting and increase only when your hair and chosen style need it.
How to use every attachment
1. Pre-dry with the nozzle
Use the pre-styling nozzle first when your hair is still very damp. Keep the airflow moving rather than holding it in one place. The aim is to remove excess water and prepare the hair for more controlled styling, not to complete the whole look with this head.
Once your hair feels damp rather than wet, switch the tool off and allow the attachment to cool before changing it.
2. Smooth with the soft brush
Divide your hair into manageable sections. Place the smoothing brush near the roots without pressing it against the scalp, then guide it slowly towards the ends with gentle tension. Smaller sections usually give the airflow more contact with the hair and are easier to control.
Repeat only as needed. Keep the brush moving and avoid holding a hot surface against one area of hair or skin.
3. Add volume with the round brush
For root lift, place the round brush underneath a section near the crown. Lift the section away from the scalp and guide the brush through the length. To shape the ends, roll them around the brush briefly, then unwind rather than pulling the brush straight through a wrapped section.
Work around the head in sections. The front pieces can be directed away from the face for a softer, more open shape.
4. Create curls with the air-curling barrels
- Choose the barrel that directs the hair in the direction you want.
- Take a small section and hold the styler vertically.
- Bring the ends close to the barrel and let the airflow draw the hair around it.
- Move the barrel towards the head without touching the face, neck or scalp.
- Hold the section for approximately 10 to 30 seconds, adjusting the time to your hair and preferred finish.
- Switch off or loosen the section, then slide the barrel down gently to release the curl.
- Allow the curl to cool before separating or brushing it.
Understanding the three heat levels
- Level 1, approximately 61 to 63°C: A useful starting point when you want lighter heat and more control.
- Level 2, approximately 96 to 98°C: A middle setting for general drying and shaping.
- Level 3, approximately 136 to 140°C: The highest setting for sections that need stronger heat and airflow.
Your ideal setting depends on your hair, section size and the result you want. Starting lower makes it easier to increase gradually instead of using more heat than the section needs.
Five common hot air styler mistakes
- Starting with soaking wet hair: Remove excess moisture first so shaping does not take unnecessarily long.
- Using sections that are too large: Smaller sections are easier for the brush or barrel to control.
- Changing attachments while they are hot: Switch off, unplug if needed and allow the head to cool before handling.
- Holding the tool against skin: External surfaces can become hot, so keep them away from the face, neck and scalp.
- Brushing curls immediately: Let each curl cool first if you want it to keep more of its shape.
Frequently asked questions
Can I use a hot air styler on wet hair?
Use it on towel-dried hair rather than hair that is dripping wet. The pre-styling nozzle can remove more moisture before you move to the brush or curling attachments.
Do I need to use all five attachments every time?
No. Choose only the heads that suit the style you want. A quick routine might use the nozzle and smoothing brush, while a fuller style could add the round brush or curling barrels.
How long should I hold hair on the curling barrel?
The supplied instructions suggest approximately 10 to 30 seconds. Use smaller sections, monitor the hair and choose the shortest effective time for your preferred result.
Choose your 5-in-1 styling set
Explore the 5-in-1 hot air styler with black storage case or the 5-in-1 hot air styler with brown storage case. Both options include the styling handle, five interchangeable heads and a case for keeping the set together.
Next, compare your options in our guide to hot air stylers, hair dryers and straighteners, or learn how to create volume, smoothness and curls with a hot air styler.
Safety reminder: Keep the tool out of reach of children. External surfaces can become hot, so avoid contact with the face, neck and skin during use.


Leave a comment
This site is protected by hCaptcha and the hCaptcha Privacy Policy and Terms of Service apply.